 QQ咨询
QQ咨询 阿里旺旺
阿里旺旺 #skype#
EasyEngine 方便的 VPS 架站套件
asyEngine 是由 rtCamp 所發佈的一支免費 Linux Shell Script, 它能讓 VPS 用精簡化的方式來運行 WordPress, EasyEngine 會在主機上自動安裝 Nginx + PHP + MySql 並且用 PHP-FPM 來處理 PHP.
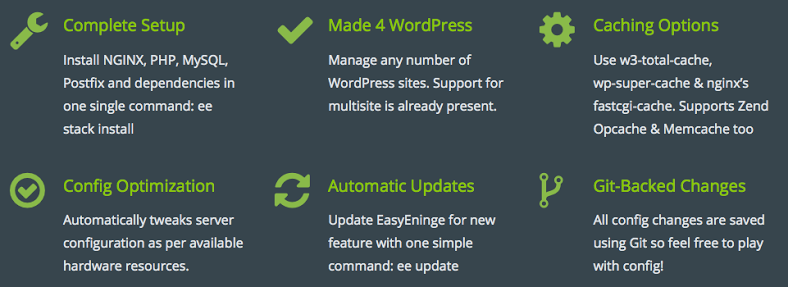

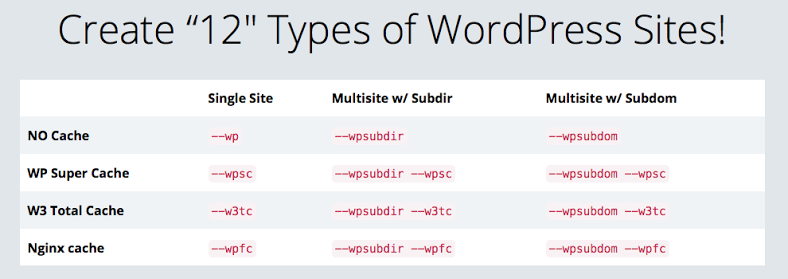
EE 有一個特別的地方, 就是在它的預設腳本裡, 可以安裝多達12種型態的 WP, 當然主要還是以快取的種類來區分, 再加上不同型式的 WP 才能有12種.
EasyEngine 只能安裝在 Debian 和 Ubuntu 的主機上, 未來也沒有計畫支援其它種類的 Linux, 還有它不是所謂的控制面板, 而是純指令的 Script, 沒有網頁介面可以登入, 對主機不太熟的人可以順便練習指令.
安裝 EasyEngine
# wget -qO ee rt.cx/ee && sudo bash ee
安裝 Nginx, PHP, MySql, Postfix
# ee stack install
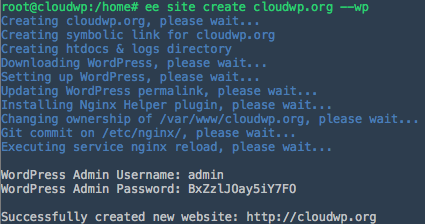
安裝 WordPress (把域名置換成你的)
# ee site create cloudwp.org --wp
另外剛剛有提到說可以安裝不同 WP 版本指的是 WordPress Multsite, 差別是子網域或是以子目錄安裝.
WPMU 是一個很好用的版本, 能讓 WP 背後多加一層管理規則, 有需要子站時都可以隨時加開, 不過缺點是備份方面比較少工具能夠支援單還原子站.
12個 WordPress 版本安裝指令
一般 WordPress
# 純 WP
# ee site create example.com --wp
# 含 w3-total-cache
# ee site create example.com --w3tc
# 含 wp-super-cache
# ee site create example.com --wpsc
# 含 nginx fastcgi_cache
# ee site create example.com --wpfc
WordPress Multsite 子目錄方式
# 純 MU 子目錄
# ee site create example.com --wpsubdir
# 含 w3-total-cache
# ee site create example.com --wpsubdir --w3tc
# 含 w3-total-cache
# ee site create example.com --wpsubdir --wpsc
# 含 nginx fastcgi_cache
# ee site create example.com --wpsubdir --wpfc
WordPress Multsite 子域名方式
# 純 MU 子域名
# ee site create example.com --wpsubdom
# 含 w3-total-cache
# ee site create example.com --wpsubdom --w3tc
# 含 w3-total-cache
# ee site create example.com --wpsubdom --wpsc
# 含 nginx fastcgi_cache
# ee site create example.com --wpsubdom --wpfc
非安裝 WordPress 的網站
# 一般靜態 html
# ee site create example.com --html
# 支援 PHP
# ee site create example.com --php
# 支援 PHP 及 MySql
# ee site create example.com --mysql
可以用來開一個最低階的 VPS 免費玩兩個月, 不用的時候記得刪掉, 就不會繼續被扣額度, 看是要試試 EasyEngine, Vesta控制面板或是 ServerPilot 控制面板都可以.
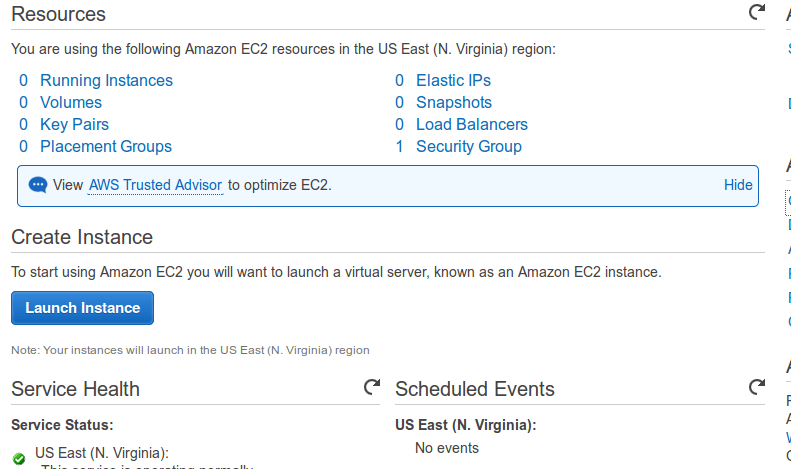
Sign up For Amazon and Follow these steps
- Launch New Instance
Click on Launch Instance to start your amazon EC2 Instance Launch.
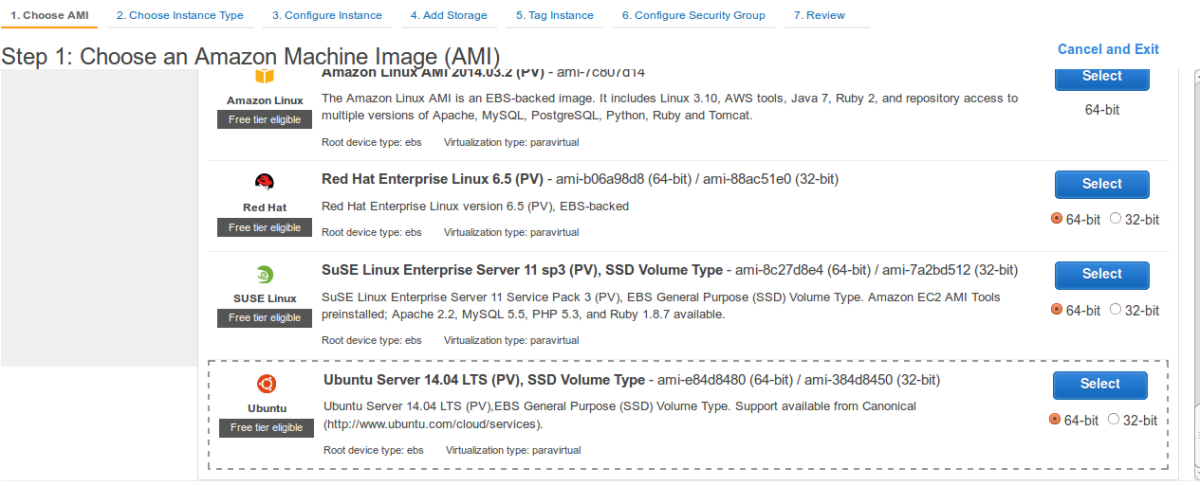
- Select AMI (Linux Distribution Image your server will be Running on).Select Ubuntu or Debian Images as EasyEngine supports these only.
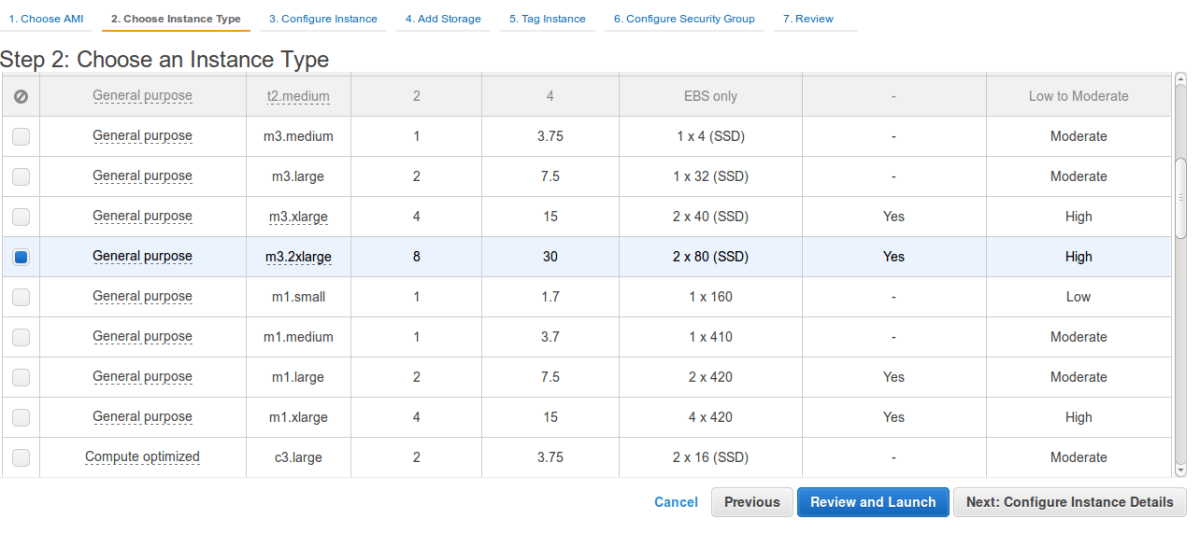
- Select Instance TypeHere select instance type as per your website needs server configuration. Like RAM, Storage..etc
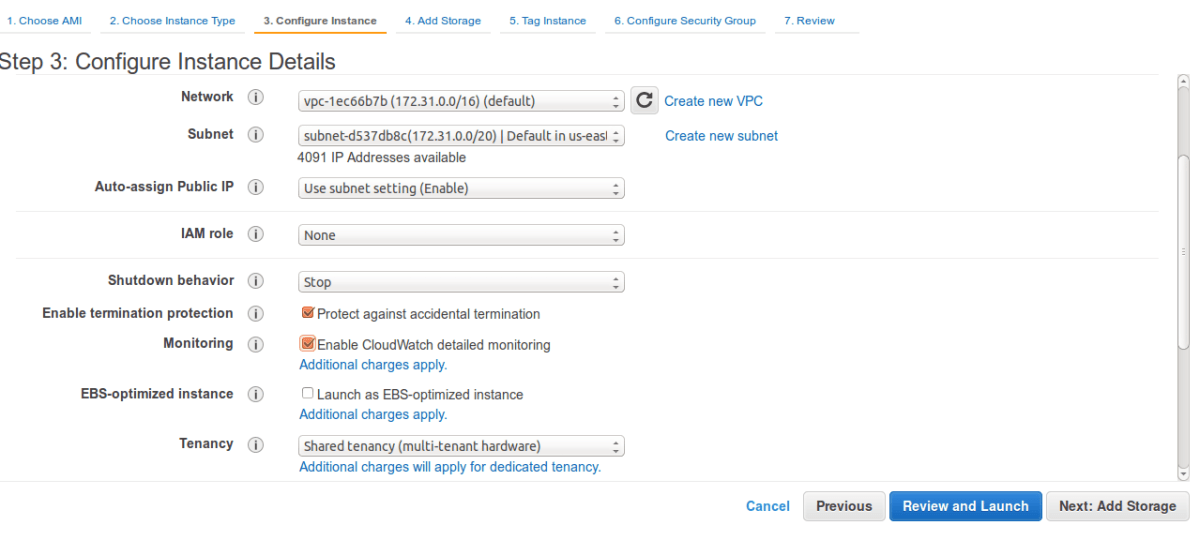
- Configure Instance DetailsHere you should select Shutdown Behaviour as Stop Otherwise your instance will get terminated on shutdown/reboot.
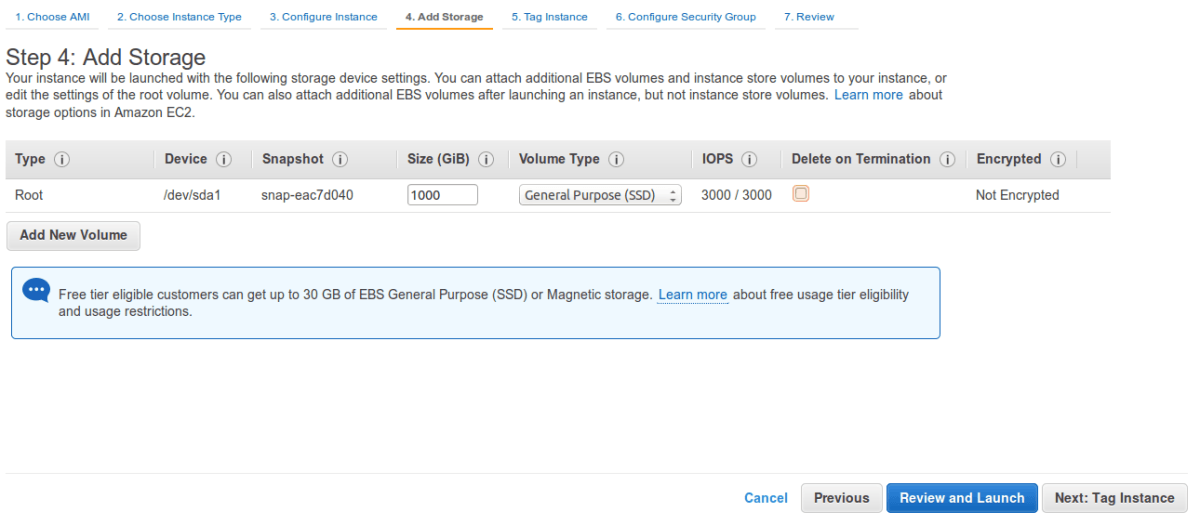
- Add StorageHere Add Storage to your instance
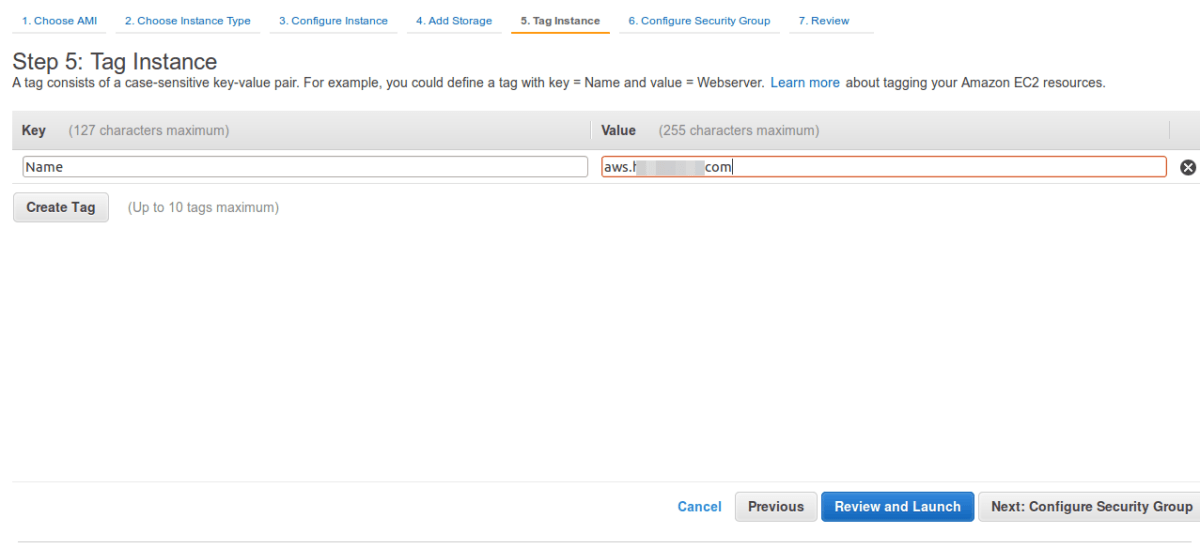
- Tag Your InstanceGive name to your instance
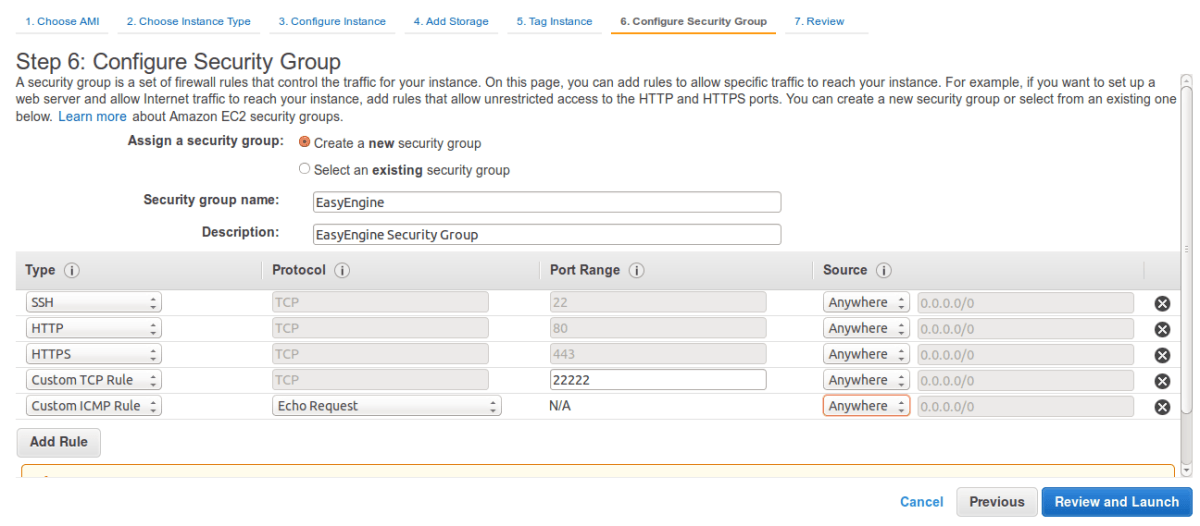
- Configure Security GroupHere you need to specify the ports you want to keep open
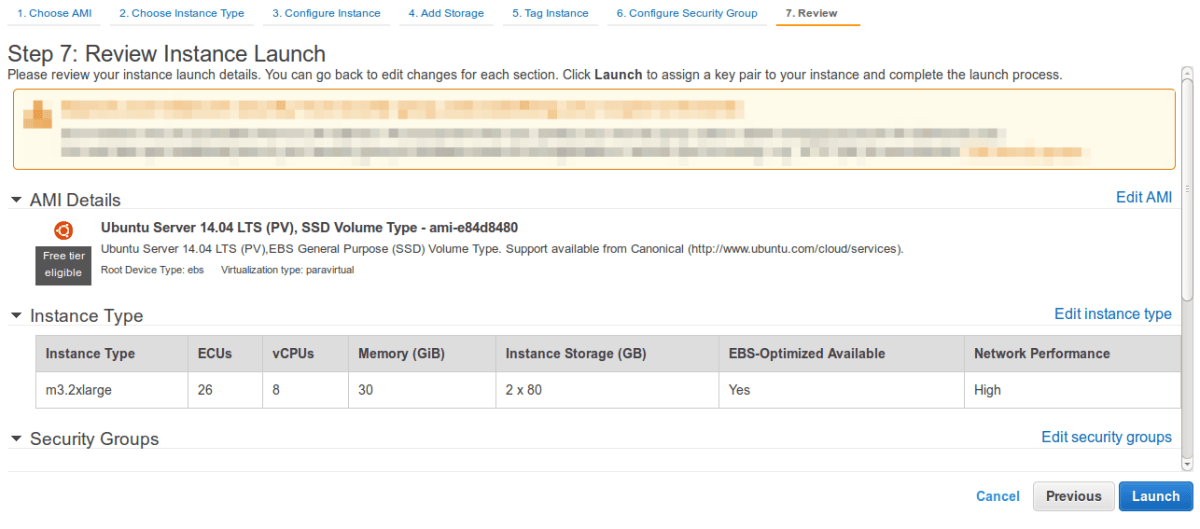
- Review your New Instance Configuration
- Click on launch instance and download the PEM Key given by AWS.
- Login To your serverUsing SSH you can login to your server in following way
#Change permission of key file chmod 600 key.pem #Connect to instance ssh -i key.pem ubuntu@<public-ip-of-ec2> - Next Step is to Install EasyEngine On your Fresh Droplet
Supported distributions
- Ubuntu 12.04, 14.04 and 16.04
- Debian 7 and 8
Port requirements
- 22/TCP (Inbound/Outbound) : Standard SSH port
- 80/TCP (Inbound/Outbound) : Standard HTTP port
- 443/TCP(Inbound/Outbound) : Standard HTTPS port
- 22222/TCP (Inbound) : To access EasyEngine admin tools
- 11371/TCP (Outbound) : To connect to GPG Key Server
Launch/Deploy/Create Server Instance
Launch/Deploy/Create your server instance with your hosting provider
Follow these guide or skip to Quick Setup If you are already done.
Quick Setup
Here are the quick commands to setup EasyEngine on your server and making your site Live
- First command installs EasyEngine on your server.
- Second command installs necessary stack and creates Single WordPress Site with domain example.com
Just paste following commands in your shell
wget -qO ee rt.cx/ee && sudo bash ee     # install easyengine
sudo ee site create awsok.com --wp     # install wordpress on awsok.com
To view your site in browser just point your domain to server.